Last Updated on 04/2026 by Mom Goes Camping
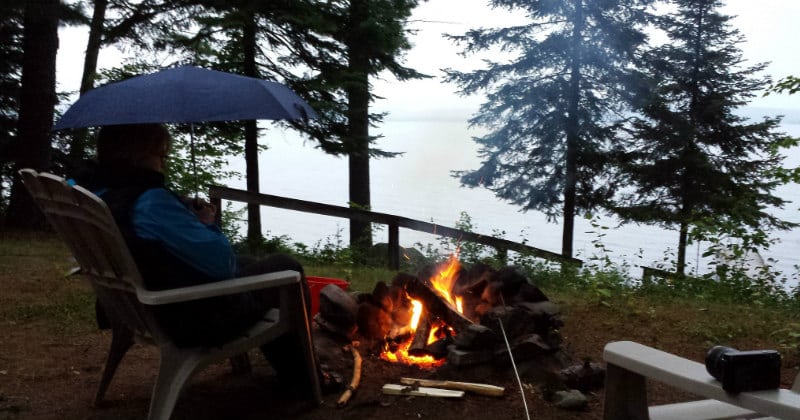
Knowing how to make a fire in the rain is one of my favorite camping skills – and honestly, one of the most rewarding. There’s something incredibly satisfying about getting a fire going in a downpour when everyone else has given up. It makes rainy camping trips actually enjoyable instead of miserable, and yeah, it’ll definitely impress your camping buddies.
Here’s the good news: it’s actually not that difficult to make a fire in the rain if you use the right fire lay. I’ve started fires in everything from light drizzles to full-on downpours, and the technique I’m sharing below works consistently. The key is understanding that you’re essentially building a shelter for your fire while it grows.
Important: Don’t bother attempting this unless you’ve got proper rain gear. If you’re not equipped to stay dry yourself, you’re better off waiting out the storm in your tent. You’ll need a quality rain jacket at minimum. I’m also a huge fan of rain pants, even though they make me look like I’m in an MC Hammer video from the 90s. You can see my picks for the best rain pants here.
Here’s the video. Detailed instructions are below.
Do You Need Dry Wood to Make a Fire in the Rain?
This is the question everyone asks, and the answer surprises most people: No, you do NOT need dry wood to make a fire in the rain – at least not with the A-frame and lean-to fire lays I’m about to show you.
However, you absolutely DO need dry tinder to get your initial kindling burning. Once you get those first small sticks going, they’ll dry out the slightly larger sticks above them. When those catch, they’ll dry the next layer, and so on. It’s a beautiful chain reaction once you get it started.
What to Use for Dry Tinder in Wet Conditions
I always carry homemade firestarters made from dryer lint dipped in Vaseline. These burn for about 7 minutes and have never let me down, even in heavy rain. They’re cheap to make and weigh almost nothing – there’s really no reason not to have them in your pack.
If you don’t have dry tinder with you, you’ll need to make some using a knife. Shave thin pieces off a stick to remove the wet exterior and expose the dry wood inside. Even in a downpour, the interior of most dead standing wood stays relatively dry. Look for standing dead branches rather than wood on the ground, which soaks through completely.


Can I Make a Fire Under a Tent or Shelter?
Absolutely not. Never make a fire underneath a shelter or tent. This is dangerous for multiple reasons:
- You risk burning down your shelter (trust me, synthetic tent materials melt and ignite fast)
- Carbon monoxide can accumulate in enclosed spaces, leading to poisoning or death
- It’s completely unnecessary – a properly built rain fire stays lit even with rain falling directly on it
That said, you CAN build your fire near the opening of a shelter, as long as you maintain a safe distance. If you’re using a tarp setup, a loue pitch (low on one end, high on the other) works particularly well. Position your fire just outside the low opening where you can tend it while staying mostly dry.

How to Make a Fire in the Rain: Step-by-Step Guide
Step 1: Clear Your Fire Pit
Start by clearing the ground as best you can. You want to remove wet leaves, pine needles, and debris. I usually use a thick stick to scrape everything away – no need for fancy tools.
The goal here is to create a clean workspace and reduce moisture at the base of your fire. Even if the ground itself is wet, getting rid of soggy debris makes a difference.

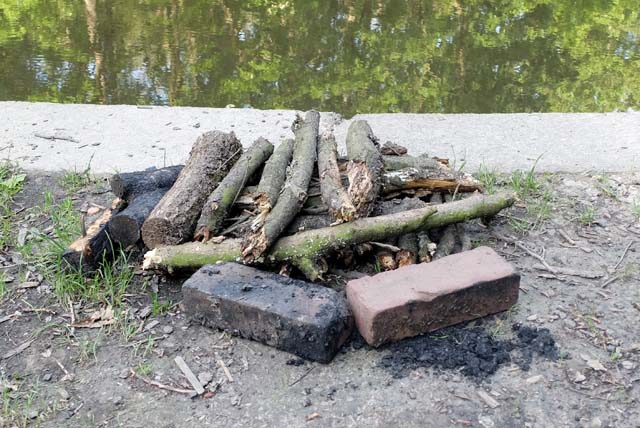
Step 2: Build a Floor for the Fire
This step is critical and often overlooked. You need to get your fire off the wet ground. Otherwise, moisture will wick up from below and kill your fire before it really gets going.
Create a platform using sticks laid side by side on the ground. These don’t need to be dry – in fact, green wood works great for this purpose since it won’t burn through quickly. Make your platform large enough to accommodate your fire base with a few inches to spare.
Here’s what’s cool: as your fire burns above, it will actually dry out these platform sticks. They’ll eventually contribute coals to your fire, giving you excellent long-lasting heat.

Step 3: Build an A-Frame or Lean-To Fire Lay
There are 6 main ways to lay a fire, but in the rain, you’ll want to use either a lean-to or an A-frame. These fire lays are genius for wet conditions because you’re essentially building a roof over your fire. The wood protects the growing flames from rain while simultaneously serving as fuel. The fire burns from bottom to top, drying each layer before it catches.
To Make a Lean-To Fire:
- Find a large log or rock and place it next to the floor you made. This becomes your frame
- Start with your smallest twigs (pencil-thin or smaller) and lean them against the frame
- Gradually add larger sticks, building up layers to create a slanted roof
- Make sure to leave an opening at the base where you’ll start your fire and where oxygen can enter
To Make an A-Frame:
- Find a long, thick log or branch – this is your ridgepole
- Prop it up on both ends over the floor you made (use rocks, forked sticks, or other logs)
- Start with small twigs and lean them on both sides of the ridgepole
- Keep adding progressively larger sticks to create a slanted roof on both sides
- The shape should look like a tent or the letter “A” from the end


Step 4: Build Up Your Roof
Keep adding sticks to your structure, working your way up with progressively larger pieces. The thicker your roof, the better it will protect the fire below from rain. I usually aim for at least 3-4 layers of increasingly large sticks.
One major advantage of this method: once you get it going, you won’t need to constantly add wood. The fire is self-feeding as it burns upward through your carefully constructed roof. This is especially valuable if you’re trying to stay dry in a nearby shelter.
Step 5: Light a Small Fire Under the Roof
Now comes the moment of truth. Using your dry tinder, light a small teepee fire under the roof you built. Place your firestarter or tinder bundle in the opening you left, surrounded by your smallest kindling.
Light it and wait. Don’t rush to add more kindling or mess with it. Give the fire time to establish itself and start drying out the wood above. This takes patience – usually 5-10 minutes before you see real progress.
Step 6: Maintain and Expand the Roof
As the fire burns upward through your structure, the lower layers will dry out the upper layers. Keep adding to the roof as needed, always maintaining that protective barrier between your flames and the rain.
Once you’ve got good coals going, the fire becomes much more resilient. At this point, it can handle rain hitting it directly without going out.

Troubleshooting Common Problems
My Fire Keeps Going Out
Usually this means one of three things:
- Not enough initial tinder: That first flame needs to burn for at least 5-7 minutes to really dry out the kindling above it. Use more tinder or better firestarters.
- Kindling too large: Start smaller than you think you need. The first layer should be twigs the thickness of a matchstick or toothpick.
- Not enough air flow: Make sure you left adequate openings for oxygen to reach the fire.
The Wood Won’t Catch
This usually happens when the wood is absolutely saturated. Look for standing dead wood rather than anything on the ground. Standing dead branches, even in rain, have drier interiors. Also, be patient – it can take 10-15 minutes for wet wood to dry enough to catch.
How Long Does It Take?
In light rain with decent materials, I can usually have a fire going in 15-20 minutes. In heavy rain or with really wet wood, it might take 30-40 minutes. Don’t give up too early – persistence pays off.
When Should You Give Up?
Be honest with yourself about conditions. If it’s an absolute deluge and you can’t find any standing dead wood, sometimes it’s better to wait. Also consider whether you actually need the fire. If you’re just trying to prove a point, that’s ego talking. If you need it for warmth or cooking, that’s different.
Always have a backup plan. I carry a backpacking stove for cooking and never rely solely on fire, especially in questionable weather.
Frequently Asked Questions
What type of wood works best in the rain?
Dead standing wood (still attached to the tree) is ideal because it stays drier inside even during rain. Avoid wood that’s been on the ground – it soaks through completely. Pine and other softwoods dry faster but burn quickly. Hardwoods like oak take longer to dry but burn longer once lit.
Can you use wet wood to start a fire?
Yes, with the A-frame or lean-to method, you can use wet wood for everything except your initial tinder. The key is starting with completely dry tinder and very small kindling, then letting the fire dry each successive layer of wood before it needs to catch.
How do you keep a fire going in the rain?
Once established, keep feeding larger wood to maintain the “roof” structure. The fire will continue drying out wood above it. If rain intensifies, add more layers to the top. A bed of good coals is your best insurance – once you have that, the fire is quite resilient.
Do fire starters work in the rain?
Yes! Commercial fire starters and homemade Vaseline-lint starters work great in rain. They provide the sustained flame needed to dry out wet kindling. They’re far more reliable than matches or basic tinder in wet conditions.
What should I do if I don’t have dry tinder?
Use a knife to shave thin strips from the inside of dead standing branches. You can also look for natural dry spots: under rock overhangs, inside hollow logs, beneath thick evergreen branches, or in bird nests. Birch bark (if you’re in an area where you can harvest sustainably) is naturally waterproof and makes excellent emergency tinder.
Final Thoughts
Making a fire in the rain is one of those skills that seems impossible until you do it once. Then it becomes second nature. The A-frame and lean-to methods work because they use physics in your favor – creating shelter for the fire while simultaneously feeding it fuel.
Practice this technique in your backyard on a rainy day before you need it in the backcountry. Once you’ve successfully done it a few times, you’ll have the confidence to try it when it really matters. And trust me, there’s nothing quite like sitting around a crackling fire you built in pouring rain, staying warm and dry while everyone else is huddled miserably in their tents.
Stay dry, stay warm, and get out there!
Guess what? I wrote a book!
The book has over 50 dehydrator recipes for backpacking — including ones with over 150 calories per ounce! Now that will shave weight from your pack!!! There’s also tons of info on nutrition and meal planning for backpacking.
Learn more here. Or buy the book instantly.

Image credits:
“0T8A5116” (CC BY 2.0) by Phototaking101
“Campfire in Rain” (CC BY 2.0) by RichardBH
“Erected loue” (CC BY-SA 3.0) by Creidiki


