
Last Updated on 01/2024 by Diane
For me, eating a delicious meal while I enjoy the view of a glacier lake or stunning vista is one of the best parts of backpacking. But figuring out what backpacking food to bring can be confusing – and bringing the wrong backpacking food can mean you end up hungry or with a very heavy pack.
This backpacking food guide goes over everything you’ll need to plan food for your trip.
Jump To:
- What Foods Are Good for Backpacking?
- Types of Backpacking Meals
- Planning Backpacking Food
- Backpacking Meal Ideas
*Guess what? I wrote an entire ebook on backpacking food. It’s got over 50 recipes plus tons of advice on meal planning, nutrition, and which foods to choose. Learn more here.
[sta_anchor id=”requirements” /]
What Foods Are Good for Backpacking?
The best backpacking foods meet these four requirements: Calorie-dense, quick and easy to prepare, packable and nutritious. I’ll go over each of these requirements below.
1. Calorie-Dense
Because you have to carry all of your food while backpacking, calorie-density is one of the most important things to consider. Calorie-dense simply means a food has a lot of calories for its weight. Note: Calorie-dense is not the same as lightweight. Think bagels (calorie dense) vs. rice cakes (lightweight).
A good baseline to shoot for is 120 calories per ounce. That will give you 3,500 calories in 29oz (1.8lbs). For longer backpacking trips where you’ll need more calories per day, aim for 130+ calories per ounce. If you get 150 calories per ounce, you’ll have 3,500 calories per day in in just 1.4lbs – a significantly less amount to carry per day.
Read: Healthy Calorie-Dense Backpacking Foods
2. Quick and Easy to Prepare
Backpacking usually means that you will be hiking for a good portion of the day. So, foods which take a long time to cook — such as “cowboy beans” and whole grains – are out of the question. You are better off with quick-cooking foods like couscous or instant rice or foods which don’t require cooking at all.
Even if you want to allocate time for cooking each time, you will still want to keep your meals simple. Otherwise you will spend a lot of time unpacking ingredients and cleaning up. You’ll want to choose meals which are quick to cook or don’t require cooking at all.
3. Packable
Some foods are calorie-dense and easy to prepare, but simply won’t survive in your backpack well. For example, avocados can end up a mashed mess in your pack. Perishable foods like soft cheeses and boiled eggs will go bad quickly. Crackers, chips and some cookies crumble easily (though you won’t mind eating the crumbs with a spoon when you are hungry enough!).

4. Nutritious
If there’s ever a time for junk food, it’s when you are trekking miles each day with a heavy pack! I definitely “reward” myself with foods like gummy bears and chocolate-covered pretzels while backpacking.
However, you need to be careful about eating too much junk food while backpacking — especially if on a long thru hike. Backpacking can put a physical strain on your body. Without enough nutrients, you can end up fatigued or even lose muscle mass. Consider adding superfoods like chia seeds or dried greens powder to your meals for an extra nutrient boost.
For more, read: Backpacking Nutrition.
Also read: Calorie-Dense Healthy Backpacking Foods
[sta_anchor id=”types” /]
Types of Backpacking Meals
You’ve got four options when it comes to backpacking meals: commercial meals, supermarket foods, DIY dehydrated meals, and assembling meals from dried ingredients. Each option has its pros/cons. Most backpackers bring a combination of all types.
Option 1: Commercial Backpacking Meals

Commercial backpacking meals usually contain freeze-dried or dehydrated ingredients which are packaged in metallic pouches. Popular brands include Mountain House, Backpacker’s Pantry and Good to Go. New brands are popping up all the time.
Pros:
- Easy to prepare. Most commercial backpacking meals can be prepared simply by adding boiling water. You can even dump the water right into the pouch, so don’t need to clean a bowl.
- Calories calculated for you. This makes meal planning a lot easier since you don’t have to tally up each ingredient.
- Long shelf life. Some meals have shelf lives of 5+ years so you don’t have to worry about them going bad if you are doing mail-drops for a long thru-hike.
Cons:
- Expensive! If you were to eat just commercial backpacking meals, you can easily spend $50 per day on food for your trip.
- Not very healthy. Most commercial backpacking meals are loaded in sodium and preservatives. They are mostly just carbs and have little to no vegetables or real meat.
- Lack options. While there are plenty of brands of backpacking meals, most have similar options. Rice and beans, mac and cheese, chili, and lasagna are all standards. If you have special dietary requirements, it can be tricky to find tasty options.
See this list of the best freeze-dried backpacking meals.
Vegans, see this list of vegan freeze-dried backpacking meals.
Option 2: Instant Supermarket Meals

There are tons of “instant meals” and “ready meals” you can buy in the supermarket. These include things like boxes of Mac n Cheese, couscous mixes, ramen, and instant soup. You’ll also find foods like jerky, dried fruit, coconut flakes, and powdered milk in supermarkets. These are great for backpacking.
Pros:
- Affordable: Compared to commercial backpacking meals, instant meals are a lot cheaper.
- Calories calculated for you: Just read the label to see how many calories are in each portion.
Cons:
- Unhealthy: Most instant meals aren’t exactly healthy. You mostly get carbohydrates without much in terms of protein or veggies. Expect a lot of sodium and preservatives.
- Need to Repackage: You will probably need to repackage the instant meals so they are easier to carry in your pack. You may also need to measure out portion sizes.
*See this list of backpacking meals from supermarket foods.
Option 3: DIY Dehdyrated Backpacking Meals

I use my dehydrator to dry entire meals (get my recipes ebook here for 50% off!). For example, I will make a massive pot of quinoa chili with tons of spices. I’ll eat some for dinner that night and the rest goes on the dehydrator to be dried for the trail.
Pros:
- Cheap: This is by far the cheapest option for backpacking meals, especially if you opt for affordable ingredients in your meals.
- Endless options: While some foods don’t dehydrate well, there are still tons of options. You can make stellar meals that you absolutely love, even if you have dietary restrictions.
- Easy to prepare: Most dehydrated meals can be prepared with the cold-soak method. Simply add water and wait a few minutes and you’ve got a meal.
- Healthier: It’s possible to dehydrate entire healthy meals or things lik quinoa, beans, vegetables… There’s no need to add preservatives and put in as much salt as you want.
- Calorie-dense: A lot of my dehydrated backpacking meals come in at 140 calories per ounce. This means your pack ends up much lighter.
Cons:
- Lots of prep: Depending on how elaborate you get with meals, dehydrating can be a lot of prep.
- Calorie counting: If you want to be precise about your calorie counts, you’ll need to tally up the calories EVERY INGREDIENT you put in the meal before dehydrating it. You’ll end up doing lots of searches like “calories in 1tbsp of oil”.
- Need to repackage: For short trips, you can just put dehydrated meals in zip baggies. For long thru-hikes, you may need to vacuum seal them.
Option 4: DIY Meals with the “Assembly” Method

You can also make your own backpacking meals by combinging dry foods with supermarket foods. For example, I dehydrate cooked vegetables and tofu then I add these to ramen to get a more nutritious meal. Or you could buy some freeze-dried meat to add to instant mashed potatoes and gravy from the supermarket.
Also read: How to Make Backpacking Meals from Bulk Dried Ingredients
Pros:
- Cheaper: If you don’t feel like dehydrating, you can buy freeze-dried ingredients in bulky. It ends up much cheaper than buying individual freeze dried meals.
- Lots of options: You can assemble various meals to your personal taste and dietary preferences.
- Healthier: You can boost supermarket foods with dried healthy add-ins to make a more nutritious meal.
Cons:
- Lots of baggies and pots: If the ingredients in your assembled meal do not rehydrate/cook at the same rate, you will need to keep them separate or prepare them in separate pots. For example, first you would rehydrate freeze-dried meat and then add instant mashed potato flakes. If you add them at the same time, the potatoes would be done before the meat got soft.
- Calorie counting: While not as tricky as with dehydrated meals, you’ll still have to tally up the calories in all the ingredients.
[sta_anchor id=”planning” /]
Planning Backpacking Meals
While it can be a pain to do, it’s incredibly important that you make a detailed plan of what you will eat during the backpacking trip.
Without a plan, you can end up with too little food and feel hungry. Or you may end up packing too much food, which means your pack is unnecessarily heavy and you have to deal with food waste while on the trail. Not fun!
Meal planning can be broken down into three steps:
1. Calculate How Much Food to Bring
No one wants to end up hungry while backpacking! But you also don’t want to bring too much food because you will have to carry it for the trip. So, you will want to carefully calculate how much food you need to bring. This can vary drastically depending on factors like your activity level, body size, how cold it is…
As a general rule though, you’ll want to bring about 2,500 to 3,500 calories per day on a 3-season backpacking trip, which should come out to approximately 2lbs of food per day.
For more detail, read: How Much Food to Bring Backpacking
2. Decide Preparation Method
There are three options when it comes to preparing backpacking meals: cooking, no-cook, and cold-soak meals.
- Cooked meals: These are arguably the most enjoyable. However, you’ll also need to bring a stove, fuel and pot. It takes time to cook the meal and do cleanup. A lot of backpackers simply don’t want to bother with this, so will opt for no-cook meals instead.
- No-cook meals: These can be something simple like a breakfast shake or protein bar. However, you can also combine ingredients to make exciting meals, such as packaged tuna and olives on a bagel.
- Cold-soak meals: Cold soaking is a prep method which involves pouring water over the mea and waiting for it to rehydrate. This is more enjoyable than eating just dry foods, but doesn’t require you to actually do any cooking. You can even rehydrate as you hike and cleanup can be a lot easier. For more, read: Guide to Cold Soak Backpacking Meals
Most backpackers will use a combination of these preparation methods. For example, they opt for a no-cook breakfast like a protein bar, a bagel with cold-soaked hummus spread for lunch, and a cooked dinner.
3. Make a Meal Plan
Now you are ready to make a meal plan. There are a lot of ways to do this (I usually just scribble one on paper for short trips), but you’ll probably need to make a spreadsheet.
Your meal plan needs to include EVERYTHING you will eat each day for the entire trip. Ideally it will include calorie amounts too
Yes, this is a major pain the first time you do it. But I promise you it gets easier!
Below is an example of a meal plan for a 4-day backpacking trip. It breaks down to approximately 4,100 calories per day.

See more Backpacking Meal Plan Examples here
[sta_anchor id=”meal-ideas” /]
Backpacking Meal Ideas
Below are some ideas for backpacking foods for breakfast, lunch, dinner, and snacks. I’ve also included tips on what kind of foods work best for these meals so you have a good trip.
For more, see this post with 29 Backpacking Meal Ideas
[sta_anchor id=”breakfast” /]
Breakfast
- Freeze-dried scrambled eggs with tortillas
- Granola with powdered milk
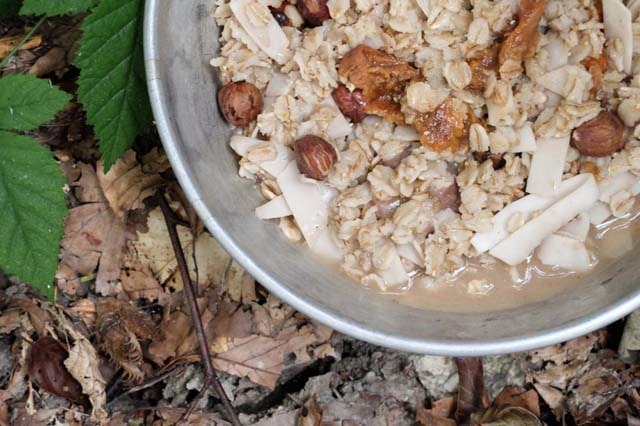
- Oatmeal with nuts and/or dried fruit
- Bagels with honey or jam pouches
- Instant breakfast shakes
- Pop Tarts

Lunch
- Bagel with peanut butter and jelly
- Tortillas with salami and cheese
- Fritos in instant hummus mix
- English muffin with tuna from a pouch
- Crackers and instant hummus mix

Dinner
- Instant tabouli + dried refried bean mix
- Instant rice + salami
- Ramen + peanut butter + soy sauce packets
- Pasta + instant sauce + TVP
- Couscous + dried falafel mix
- Instant soup + croutons
- Mac and cheese + freeze dried chicken

What do you eat while backpacking? Let us know any tips or recipes you have in the comments section below.
Image credits:
“Camping” (CC BY-NC-ND 2.0) by O.Taillon
“Hiker Food for 4 days” (CC BY 2.0) by Gronkca
“Places I’d rather be” (CC BY-NC-ND 2.0) by In Memoriam: VernsPics
“Dinner time” (CC BY-NC-ND 2.0) by Tarnie


